When performing on club sound systems, inconsistent track volume creates constant distraction. You load an older classic, and the channel meter barely flickers. You cue a recent digital release, and the mixer channel clips into the red. You spend the transition riding the trim knob instead of focusing on phrase mixing and crowd energy.
This tutorial demonstrates how to standardize your entire digital music crate to club standards before exporting to USB. Using Waveforge, you calibrate perceived loudness and prevent digital-to-analog converter clipping without damaging original audio files.
Why Software Auto-Gain Fails on Hardware Players
Most DJ software packages include an internal auto-gain feature. However, auto-gain suffers from two fatal limitations during live performances:
- Metadata Ignored by Standalone CDJs: Player firmware often reads proprietary gain metadata incorrectly or ignores it completely when reading basic USB drives.
- No Intersample Peak Awareness: Standard normalizers look only at sample peaks. When compressed audio runs through club digital-to-analog converters, reconstruction filters generate intersample peaks up to +3 dBTP above digital zero, producing harsh distortion in large sound systems.
The reliable solution is physical normalization: writing calibrated, true-peak compliant audio files into a dedicated export folder.
Step 1: Import Your Crates into the Offline Dropzone
Open Waveforge on your studio workstation or touring laptop. The interface launches with an empty library dropzone ready for file intake.

Drag your crate folders directly into the central window. Waveforge accepts WAV, AIFF, FLAC, and MP3 files. Because the software operates entirely locally, intake requires no internet connection and uploads no unreleased audio to remote servers.
Step 2: Configure Loudness Target and True-Peak Ceiling
Once files load into the library table, the bottom control bar displays target configuration parameters.
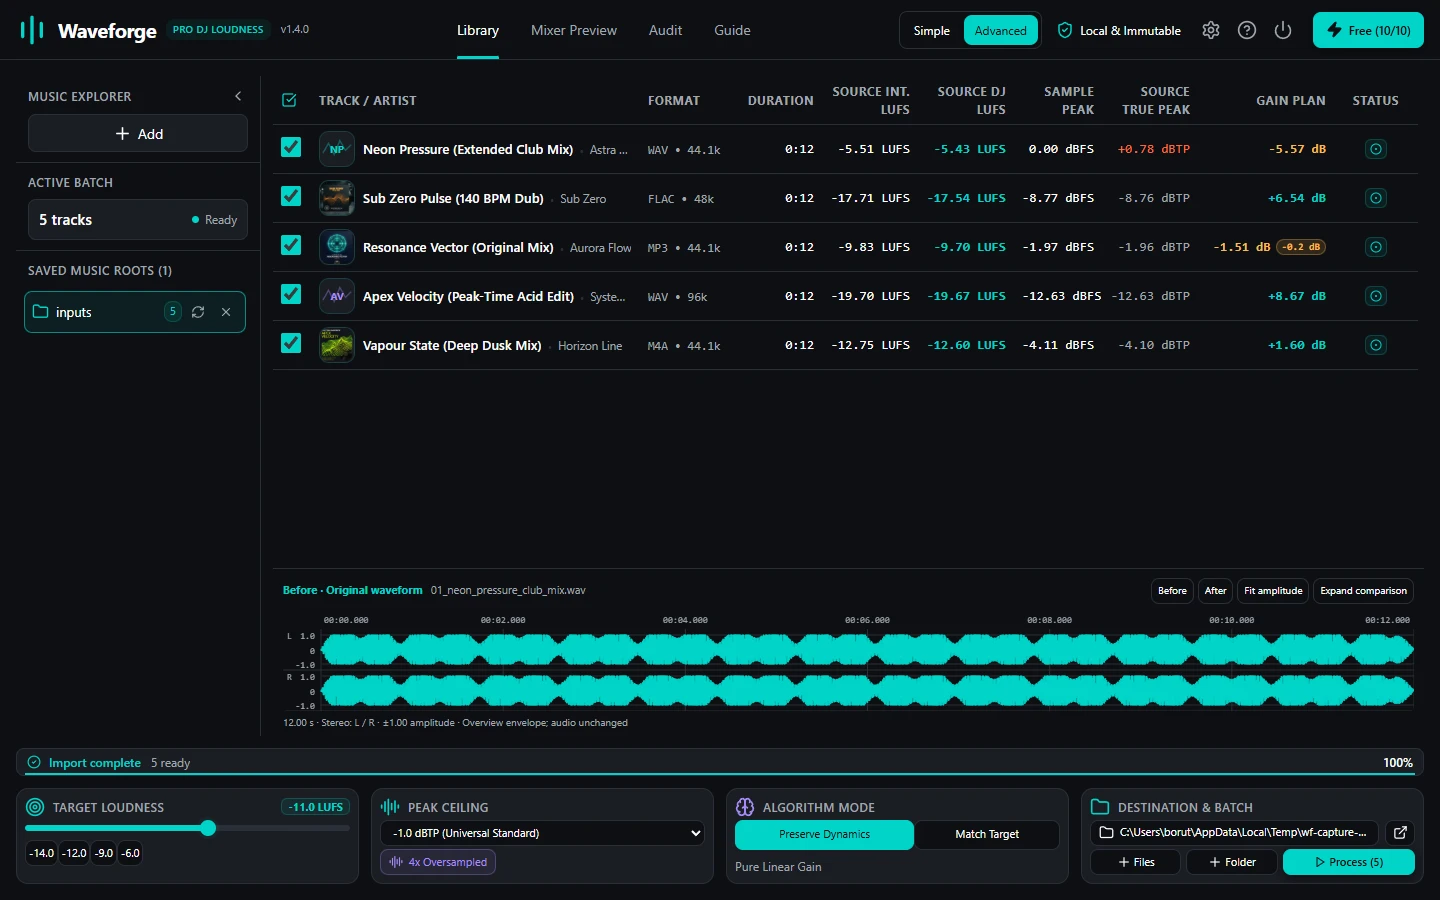
For club sound systems, configure the following values:
- Integrated Target (-11.0 LUFS): The international standard for club systems. This matches the acoustic energy of commercial club masters while preserving dynamic punch in drum transients.
- True-Peak Ceiling (-1.0 dBTP): Enforces a safety margin. This ensures digital-to-analog reconstruction filters on Pioneer CDJ-2000NXS2 and CDJ-3000 units do not clip the analog stage.
- Processing Mode (PreserveDynamics): Applies pure mathematical linear gain. If an older dynamic master cannot safely reach -11 LUFS without exceeding -1.0 dBTP, Waveforge applies the maximum safe gain and logs the exact shortfall rather than compressing your track.
Step 3: Execute Batch Processing and Verify Results
Click Process Batch. Waveforge analyzes each track using ITU-R BS.1770-4 K-weighting filters and computes the necessary gain adjustments.
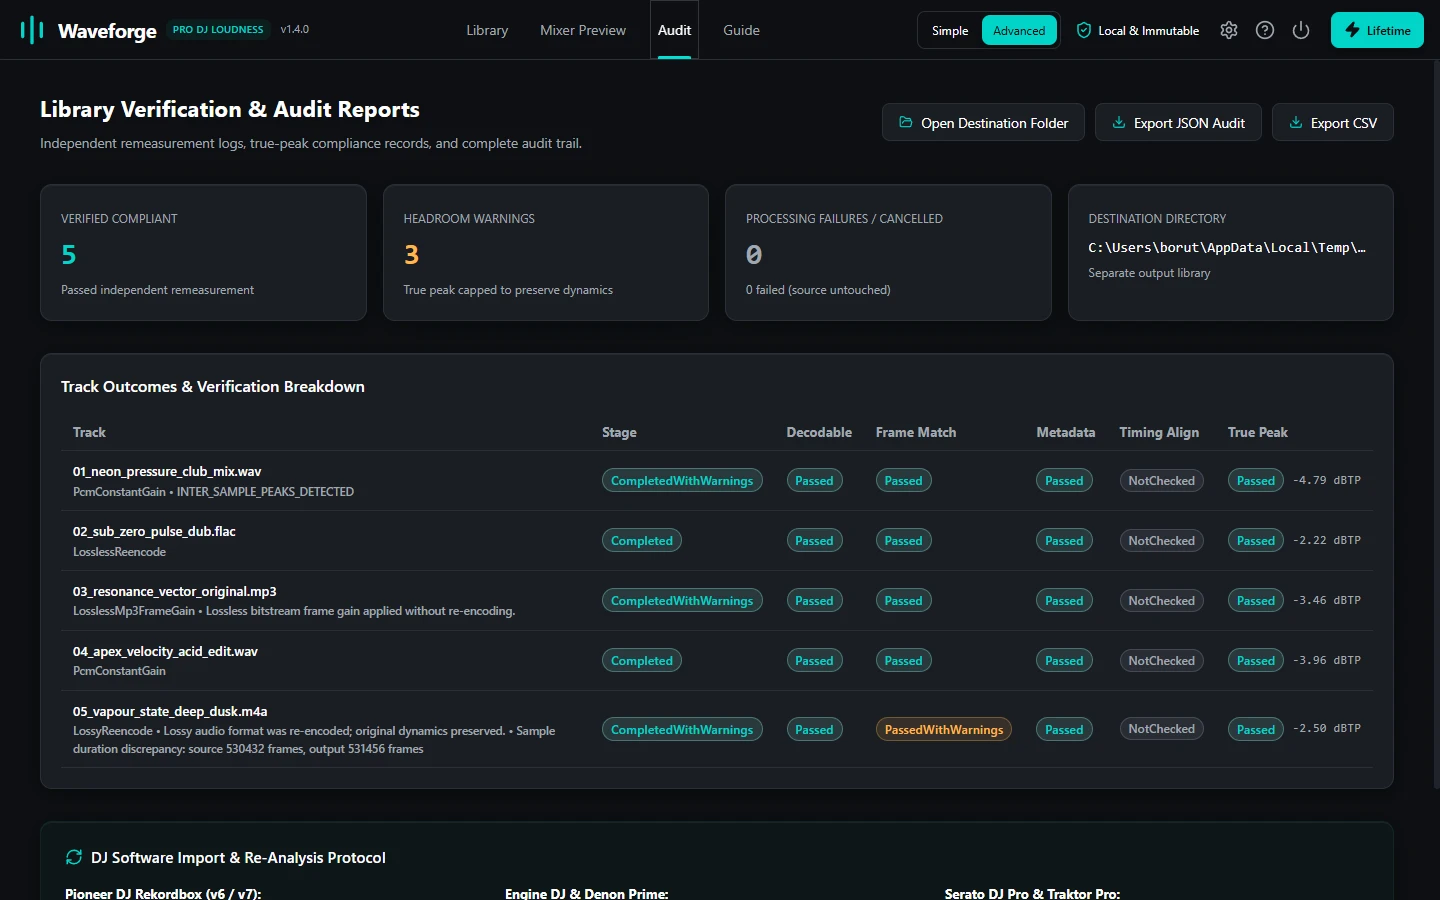
Following execution, Waveforge reopens and independently measures every generated output file. The results view marks compliant tracks with green badges. If a track required MP3 FrameGain, the software confirms that lossless bitstream adjustments were applied with zero re-encoding loss.
Step 4: Export to USB and Configure Player Settings
With your normalized crate written to disk:
- Open Rekordbox, Serato, or Engine DJ.
- Import the normalized directory into your collection.
- Disable software auto-gain in your DJ application preferences. Because every track now shares an identical acoustic baseline (-11 LUFS with -1.0 dBTP ceiling), software volume adjustments are redundant.
- Sync the crate to your USB drive.
When you plug into a Pioneer DJM-900NXS2 or DJM-A9 mixer, leave channel trim knobs at 12 o'clock nominal. Transitions will land with identical power, kicks will punch cleanly through the subwoofers, and your mixer channel meters will remain out of the distortion zone.
Calibrate Your Crates with Waveforge
Download the standalone workstation for macOS and Windows. 100% offline, zero subscriptions, and permanent lifetime ownership.
GET WAVEFORGE LIFETIME · €34.99 EUR